
Chain Piecing the Emergence Quilt
Chain piecing used to intimidate me. I had a hard time keeping my blocks organized and always ended up sewing them on the wrong way. When I was creating the Emergence Quilt pattern, I knew chain piecing would be the most efficient technique for putting it together, so I really thought through how to best organize the blocks. The tutorial below shows the technique that I have found to be easy and efficient!
Step 1:
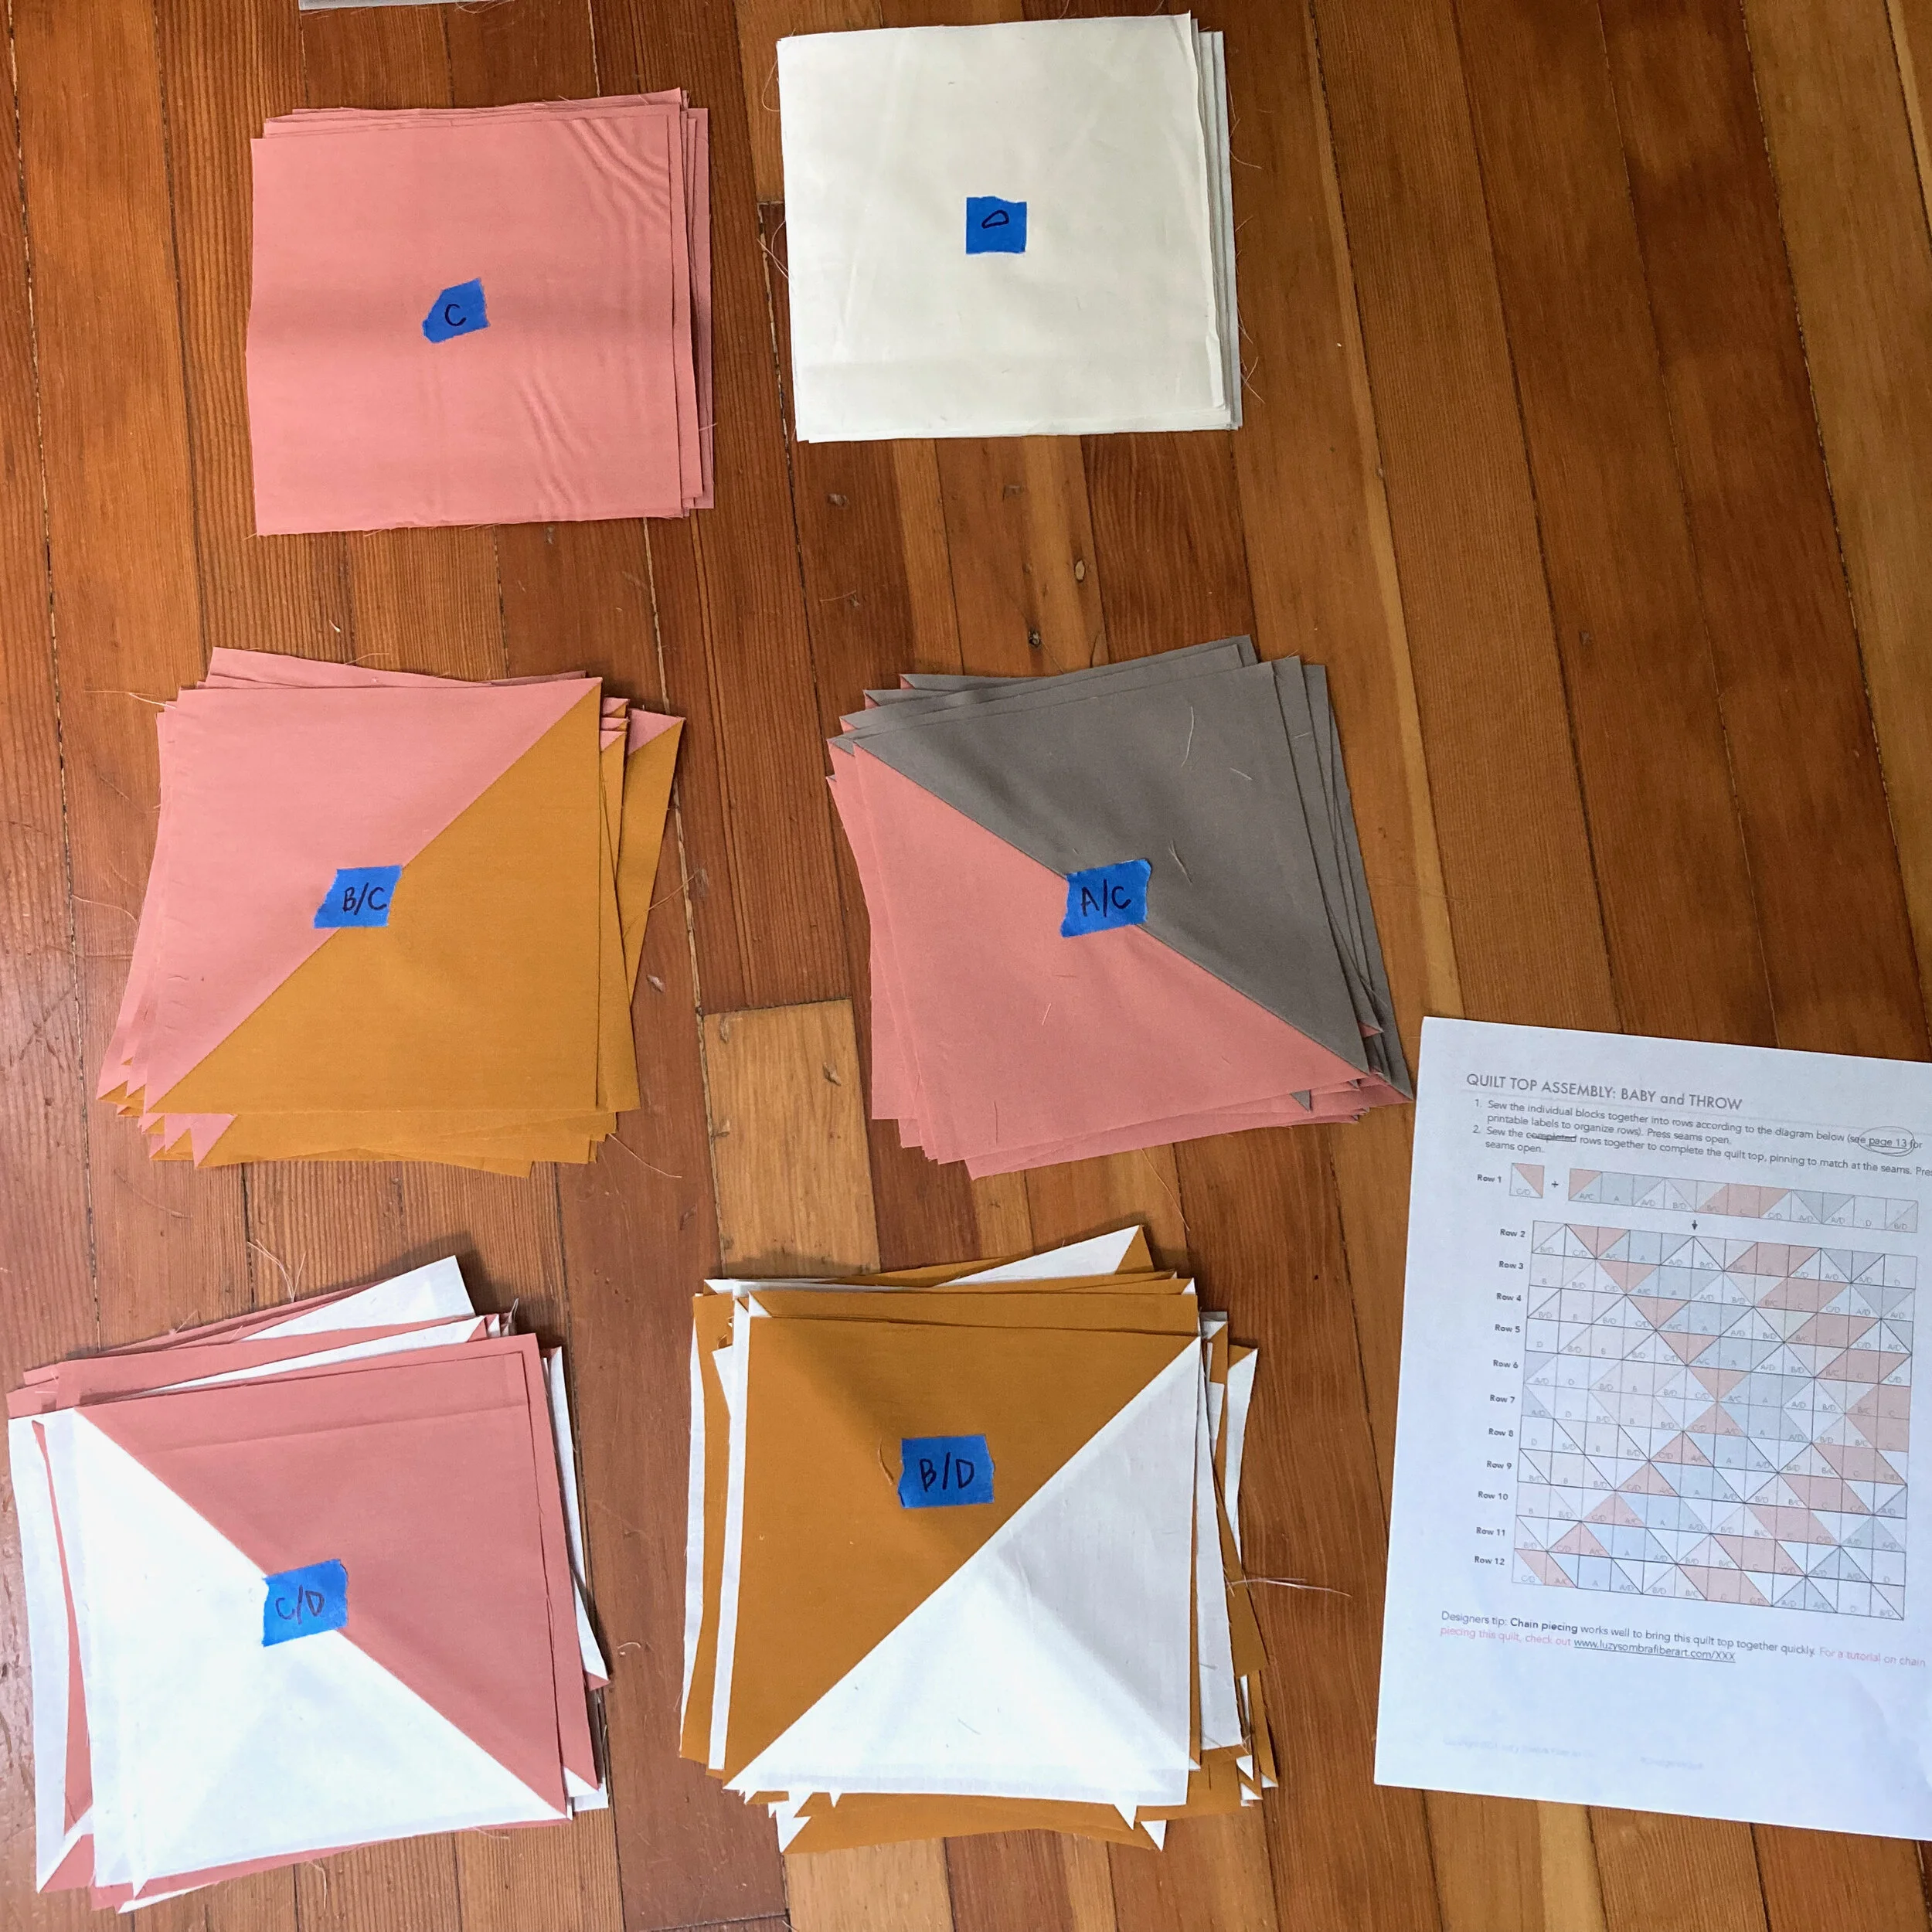
Gather all the blocks and lay them out with labels.
Find the Quilt Top Assembly page for the size quilt you are making to use as a reference.
Step 2:
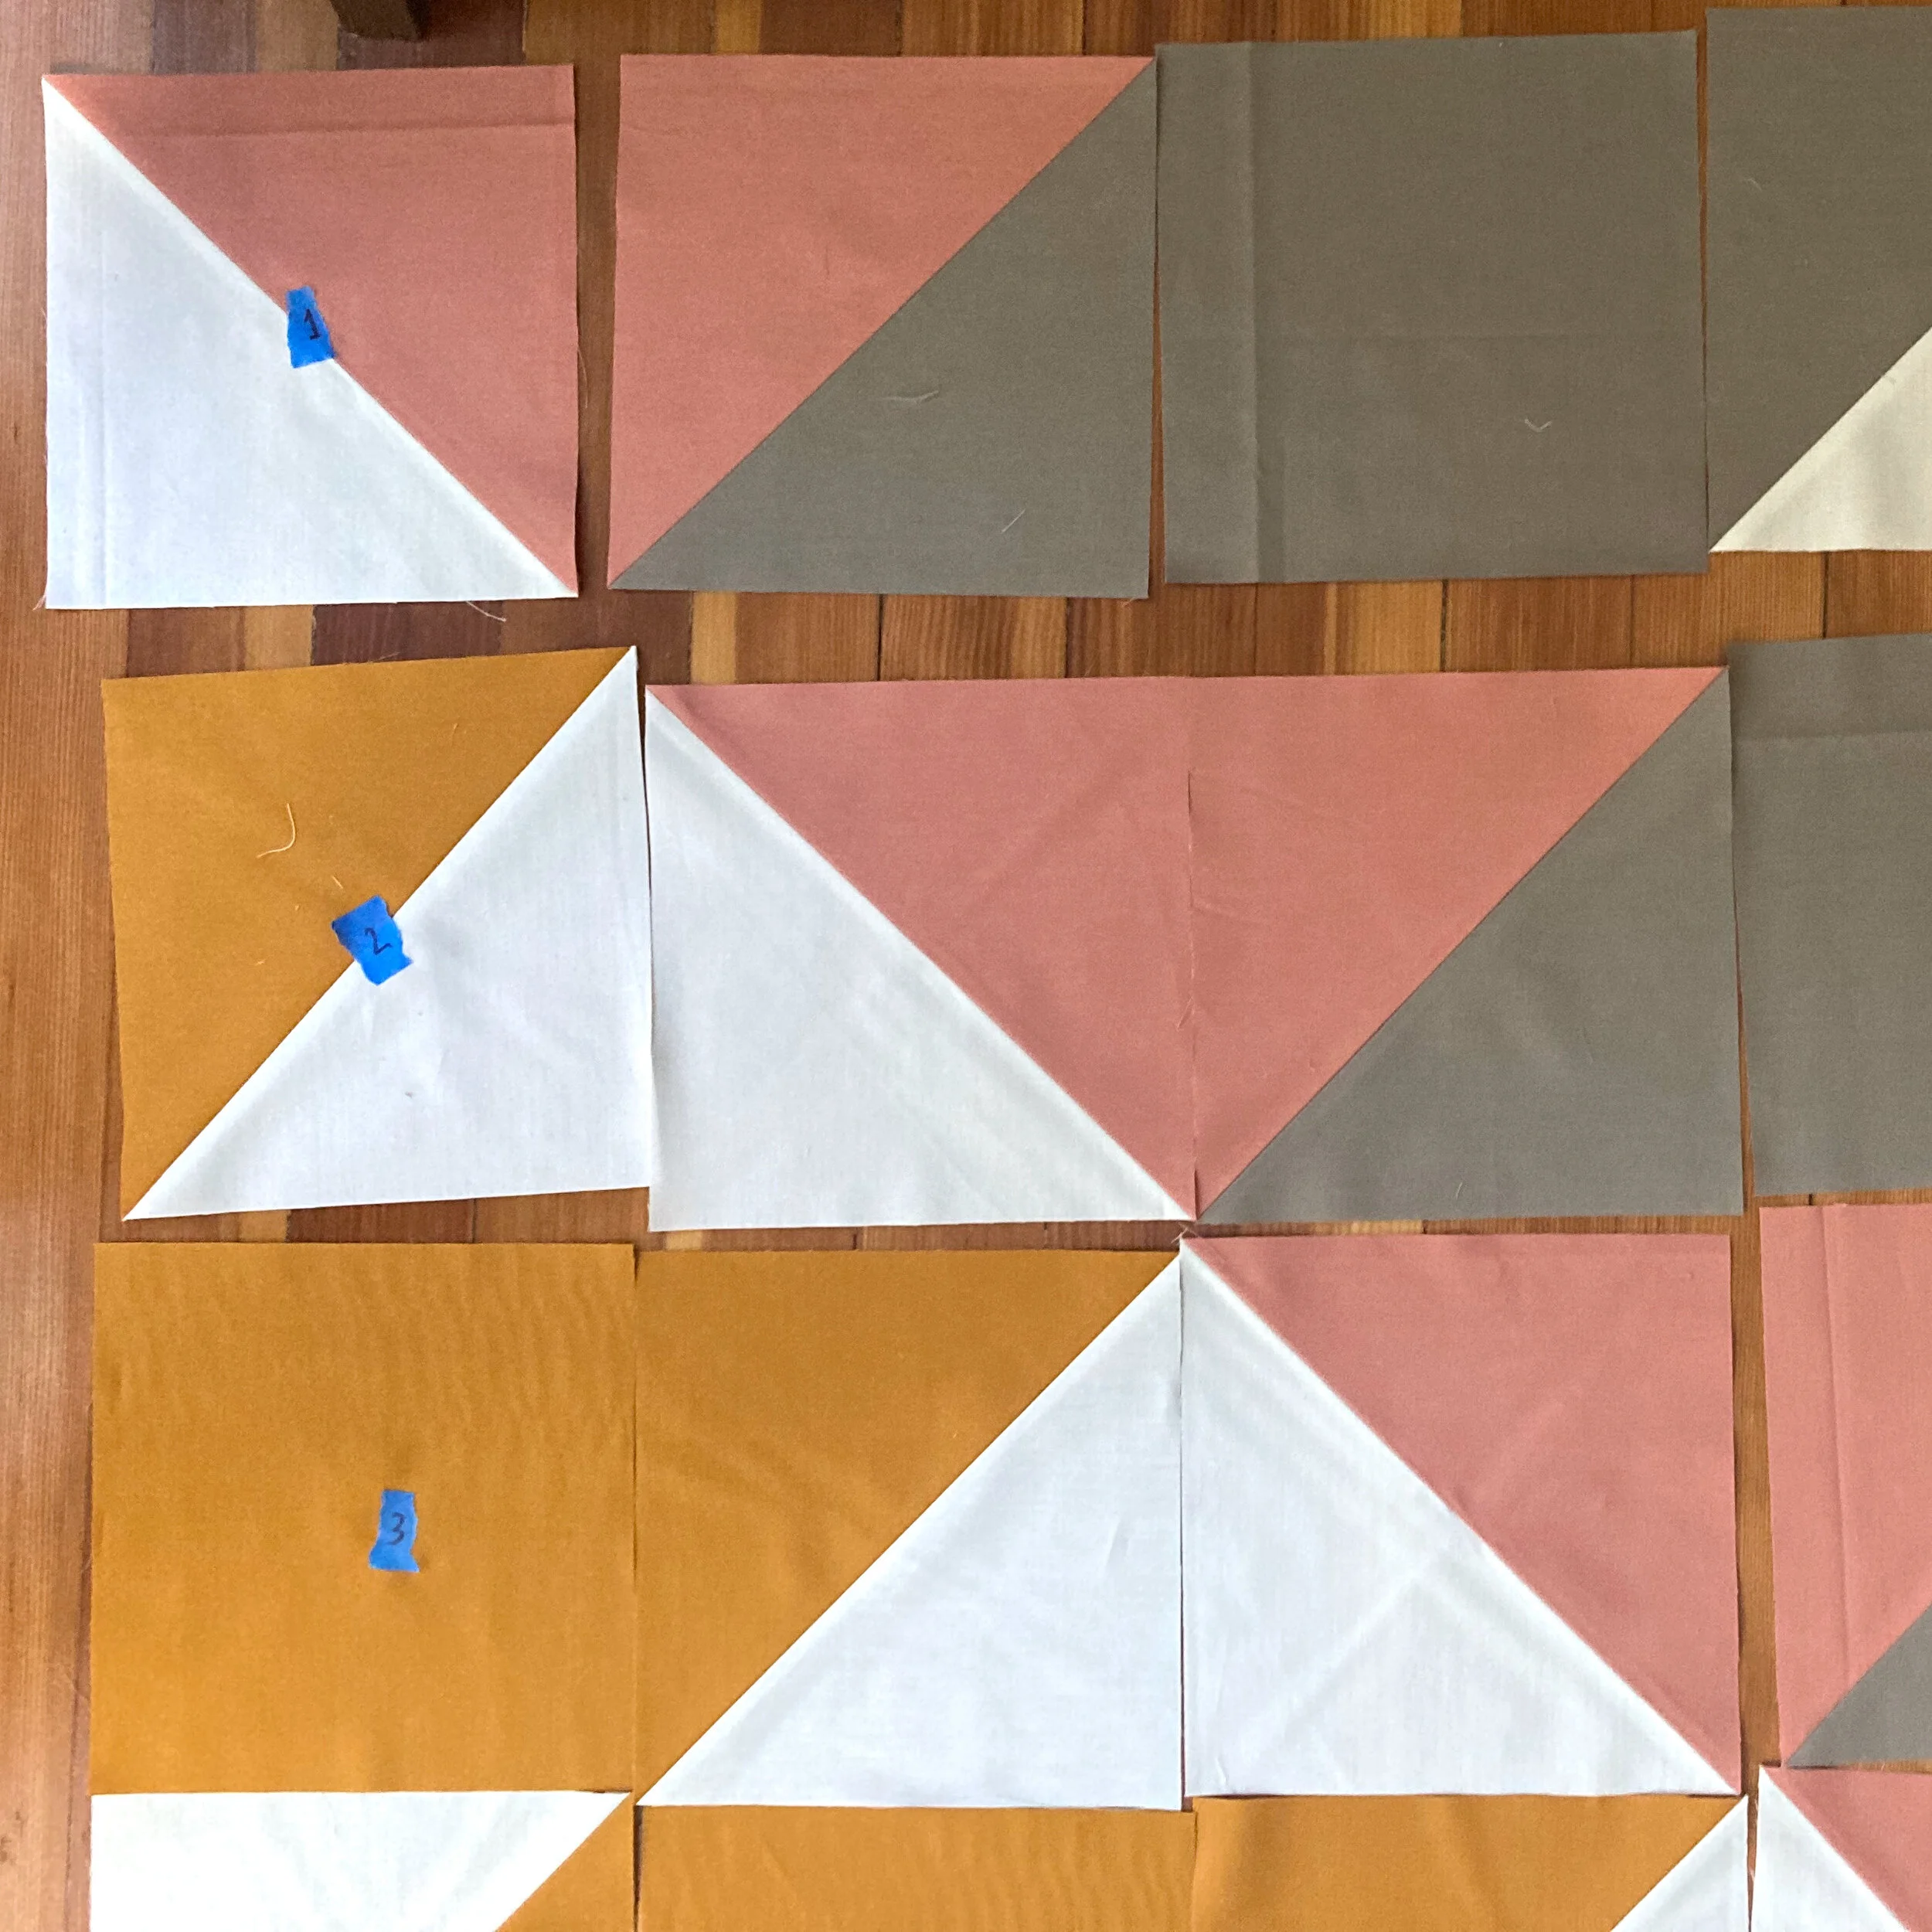
You’ll need to clear some floor space for this one! Arrange the blocks according to the Quilt Assembly page layout. Place a label on left-most block to mark each row (1, 2, 3, etc…). I like to use blue painters tape for labels as it doesn’t leave any residue on the fabric.

Step 3:
Stack the blocks in each row. Begin with the left-most block (the block with the label) and place it on top of the second block in the row. Take those two blocks and stack them on top of the third block in the row. Continue like this until you reach the end of the row, being careful to keep all of your blocks oriented properly. The block with the label will be on top and the last block in the row will be on the bottom. Repeat this for all rows.
Check out the video below for a time lapse of steps 2 and 3 in action!

Step 4:
Organize your stacks near your sewing table arranged in order. Add a second label next to each stack indicating the row.
NOTE: Be sure to clearly mark which way is up especially for Rows 1 and 11, since these can be easily flipped upside-down. You don’t want to end up with blocks oriented the wrong way in one of your rows (ask me how I know).
Step 5:
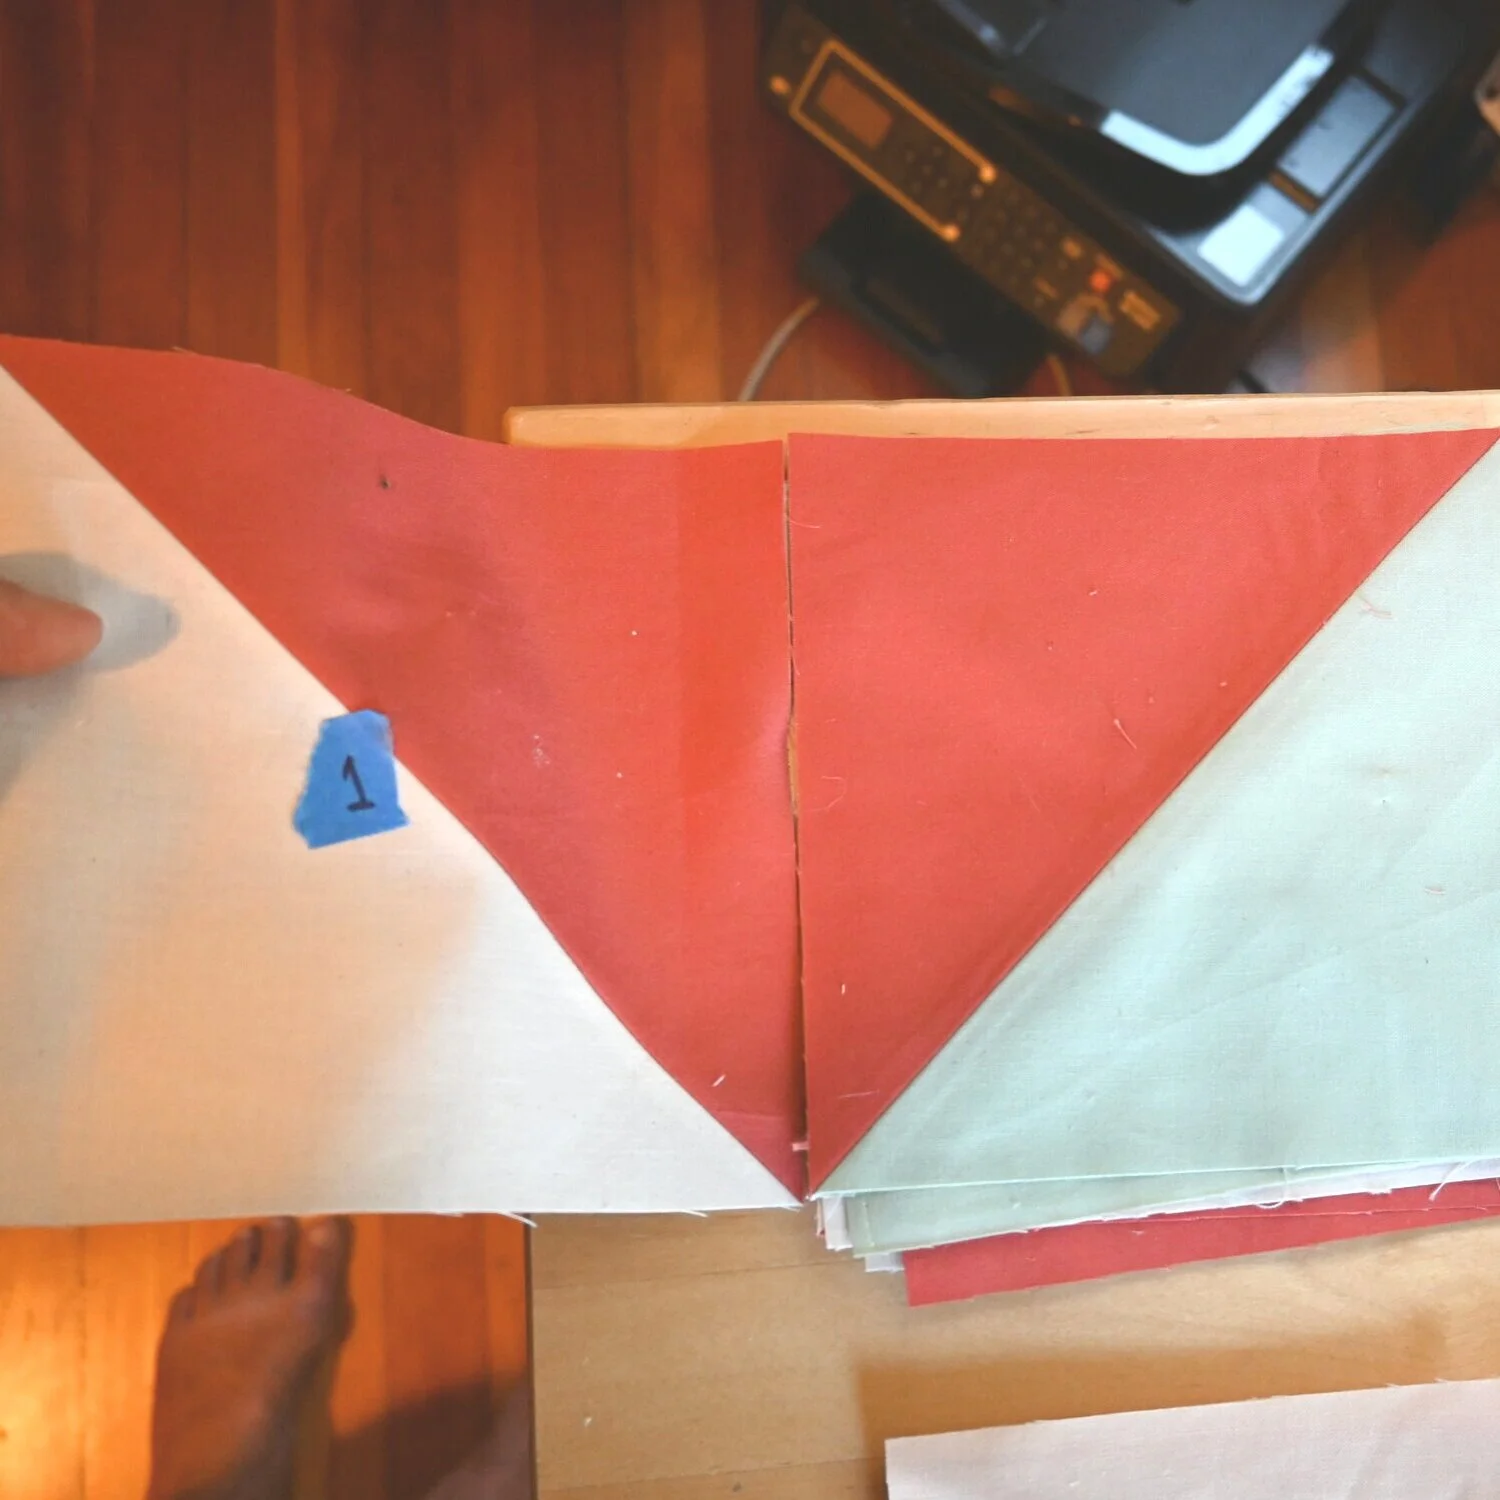
Take your top block from Row 1 and place it next to the block underneath it (this is the second block in the row). Flip the second block over the top of the first as if you were turning the page of a book so that right sides are together. Sew a 1/4” seam on the right side. See video below for a demonstration of how to do this.
Sew to the end of the block, but do NOT cut your threads or remove the block from your machine. Repeat Step 5 with the Row 2 and begin sewing where you ended the previous row. This will make your chain! Continue this for all rows.

This video provides a quick demonstration of how to start chain piecing the first two blocks in your row.
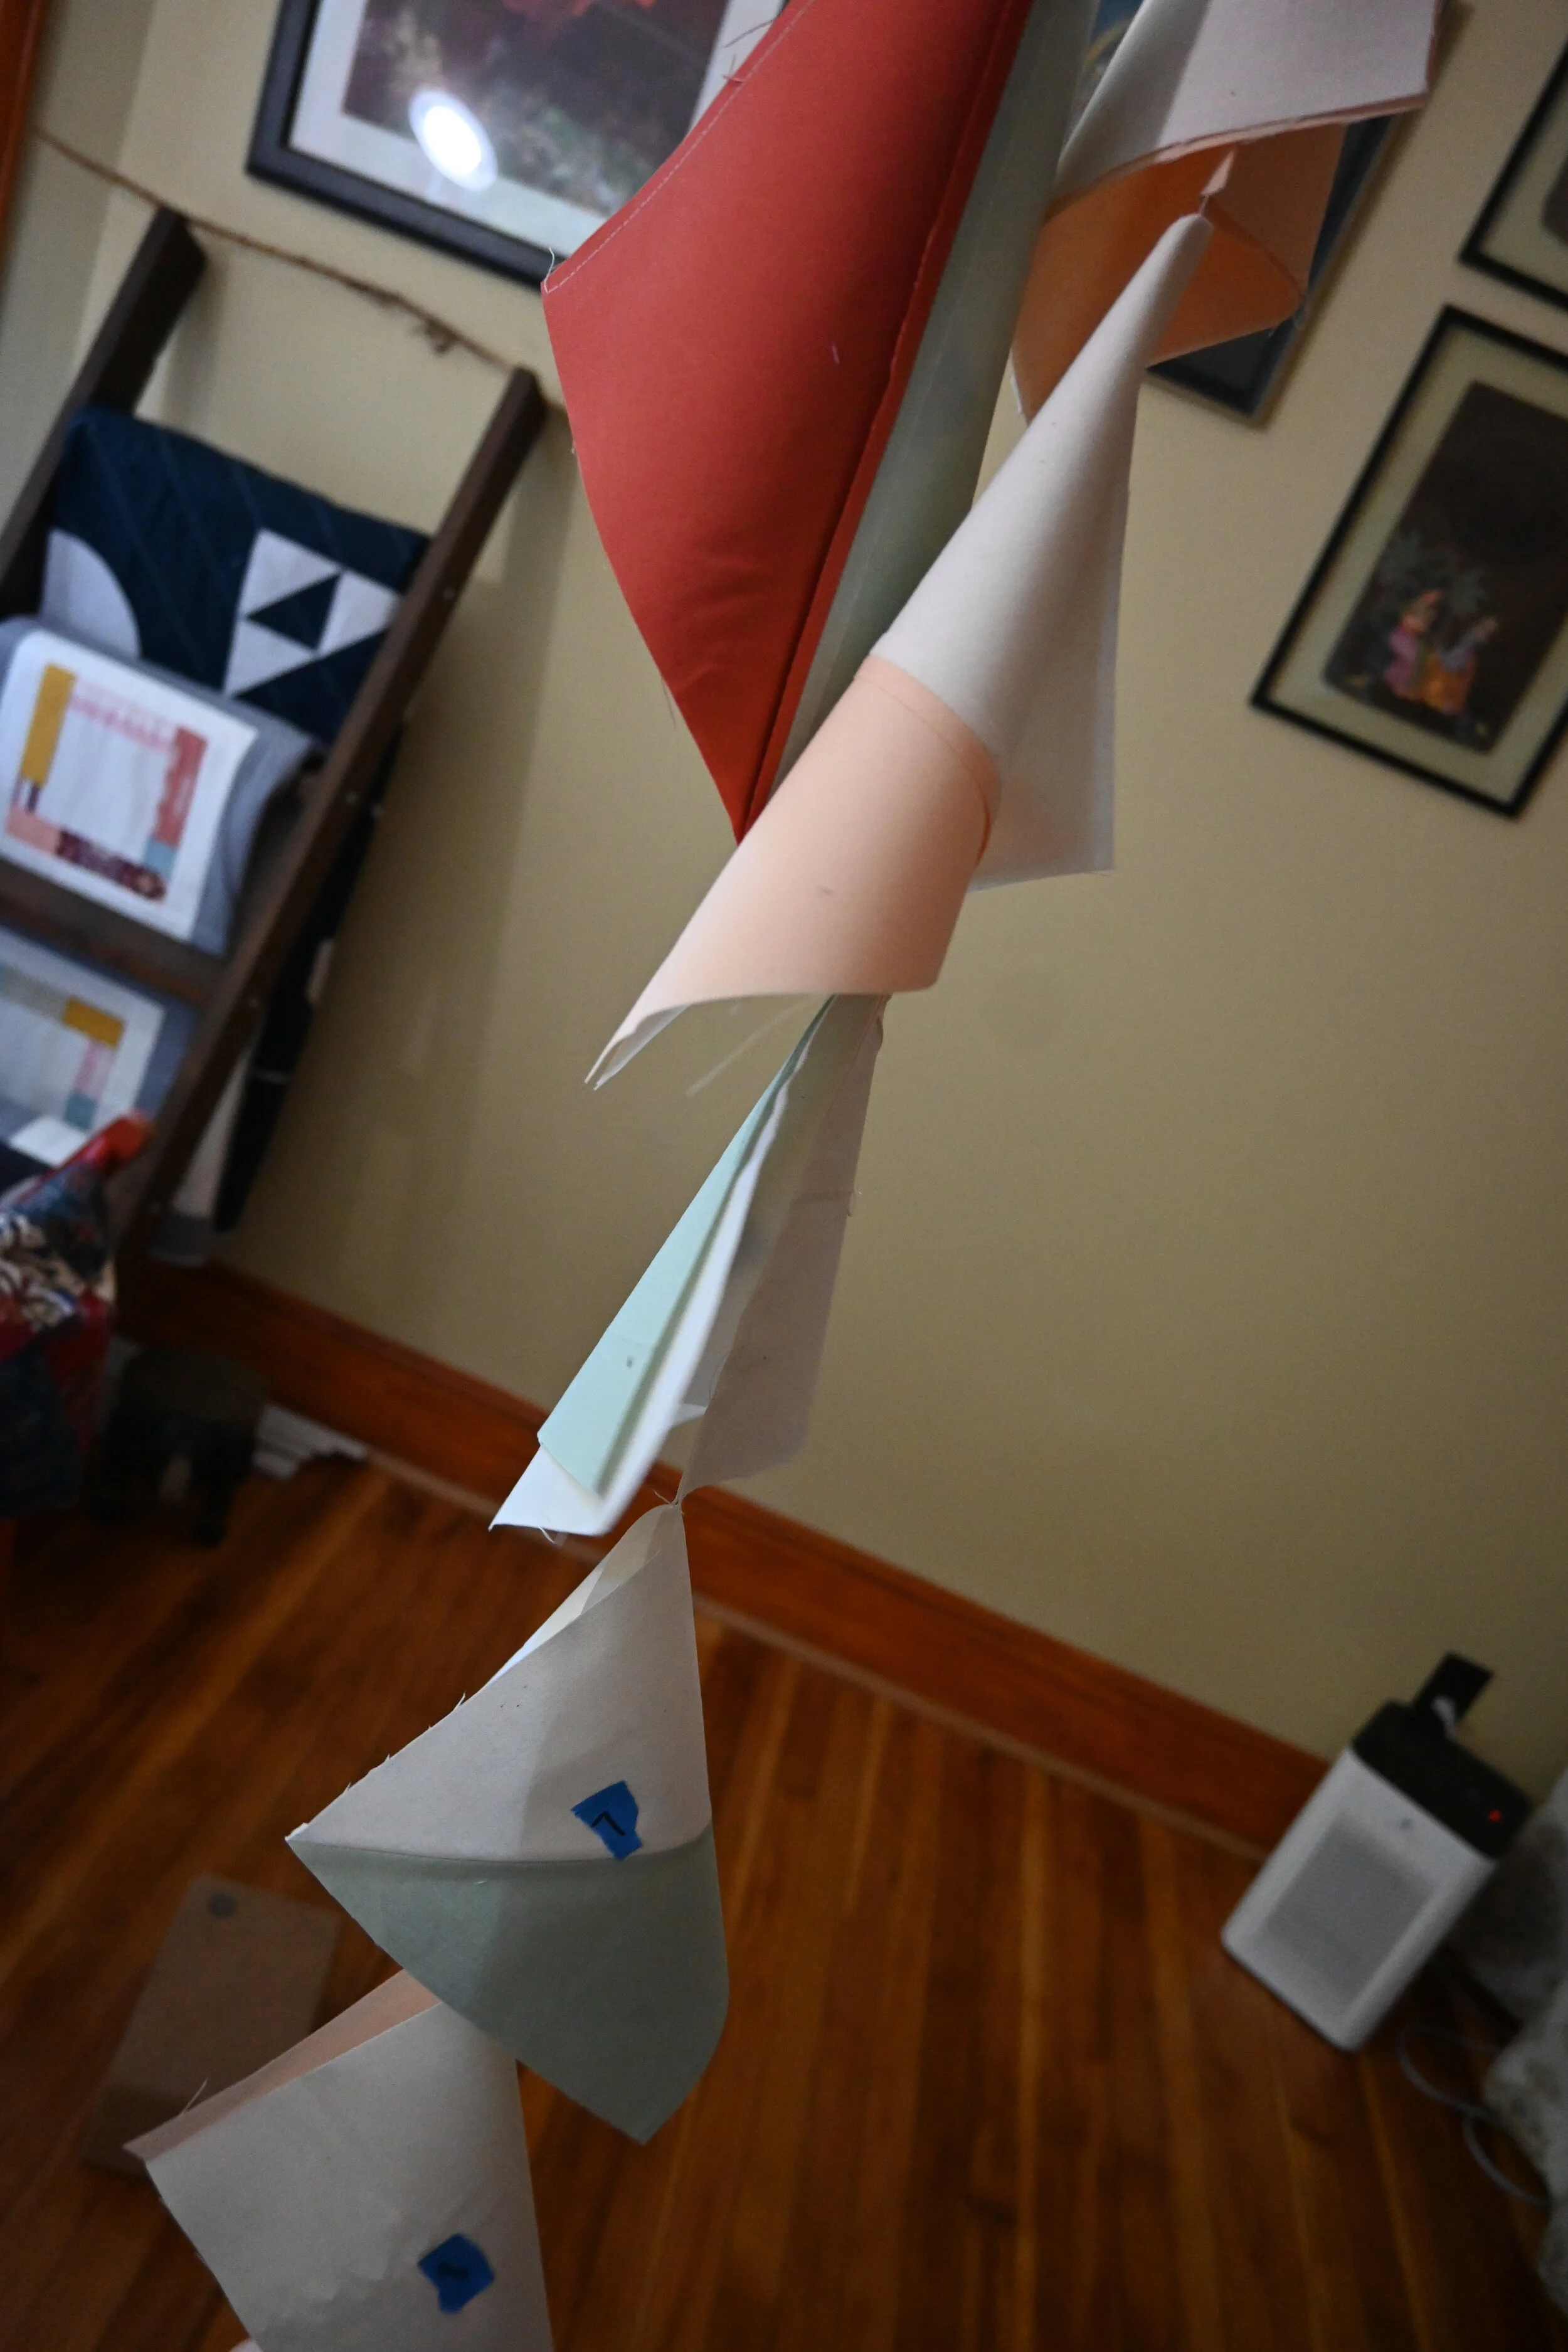
Step 6:
Once you have sewn the first two blocks together for all rows, cut the threads from the last block only and remove the blocks from the machine. You should have a lovely chain of blocks!
Add the next block to each row, building to the right. The label will always be to the left. Keep threads intact in between blocks. Continue until all rows are complete.
See video below for some tips on adding blocks to your rows.

This video demonstrates how to add a block to your row when chain piecing.

You did it!
You will now have all of your rows complete and attached together (it’s pretty cool, right?). Snip the threads between the rows and press seams open. I recommend keeping the labels attached to your rows until you have all of the rows sewn together.
I’d love to see a photo of your chain pieced rows! Tag me on Instagram @luzysombrafiberart.